Support Tickets
The Tickets feature allows you to communicate with our support team, manage your requests, and track their status directly within the bouncify application. This guide will walk you through creating new tickets, viewing existing ones, and managing your communication with us.
Viewing Your Tickets
To access your tickets, navigate to the Tickets section from the main menu. Here, you will find a list of all your past and current tickets.

The ticket list provides the following information for each ticket:
- Status: Indicates whether the ticket is
OpenorClosed. - Number: A unique identification number for the ticket (e.g.,
#107). - Subject: A brief summary of the ticket's topic.
- Type: The category the ticket falls under (e.g.,
Support,Billing). - Created: The date and time the ticket was created.
- View: An icon to click to view the full details of the ticket.
At the bottom of the list, you can control the number of tickets displayed per page.
Creating a New Ticket
You can create a new ticket to get help with any issues or questions you may have.
-
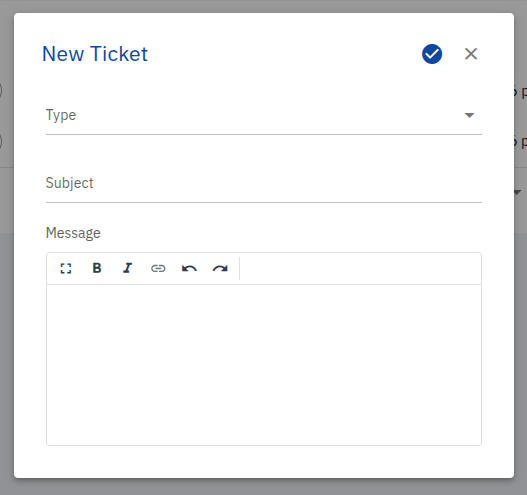
Click the New Ticket button located at the top right of the Tickets page.
-
A New Ticket dialog will appear.
-
Fill in the following fields:
-
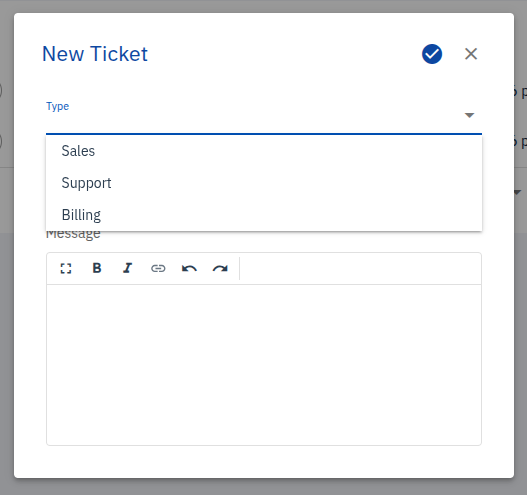
Type: Select the category that best describes your request. This helps us route your ticket to the right team. The available options are:
- Sales
- Support
- Billing
-
Subject: Enter a concise and descriptive title for your ticket.
-
Message: Provide a detailed description of your issue or question. You can use the rich text editor to format your message with options like bold, italics, and links.
To attach an imageYou can paste images directly into the message box.
-
-
Once you have filled in all the details, click the checkmark icon to submit your ticket.
Viewing and Replying to a Ticket
To view the details of a specific ticket or to reply to it, click the view icon in the ticket list. This will open the ticket view.
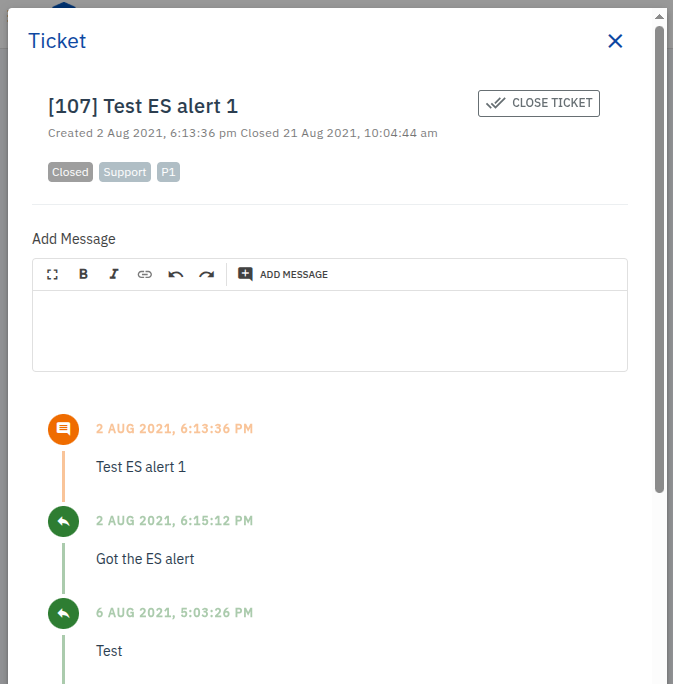
In the ticket view, you can see:
- The ticket number and subject.
- The creation and last update timestamps.
- The ticket's current status, type, and priority.
- A complete history of the conversation.
Adding a Message
To add a new message to the conversation:
- Type your reply in the Add Message text box.
- Use the formatting options if needed.
- Click the ADD MESSAGE button to send your reply.
You can paste images directly into the message box.
Closing a Ticket
If your issue has been resolved, you can close the ticket by clicking the CLOSE TICKET button at the top of the ticket view. This will change the ticket's status to Closed.