


Native Direct Integration
WebEngage Email Verification
Automate contact list hygiene between Bouncify and WebEngage. Verify subscriber lists in bulk and suppress bounces with one click.
How to Connect and Verify WebEngage Lists
Follow this step-by-step setup guide to authenticate your WebEngage account, import your contact lists, run deep multi-stage verification, and export clean subscriber data directly back into WebEngage.
Maximize Your Event Success with Bouncify and WebEngage Integration
- WebEngage is a full-stack marketing automation suite that drives growth for consumer businesses by enabling them to engage users via multiple channels.
How to integrate Bouncify with WebEngage?
Trigger- These are entry points or conditions that set the context of the Journey. Add the Trigger event of your preference.
- Action Blocks enable you to engage users at various points in their Trip, make an API call to your servers to update/request details of a user in the Journey and update User Attributes in your dashboard as per a user's latest Journey interactions.
An API is a connection between your WebEngage dashboard and Bouncify that enables you to exchange information as and when needed.
- First Login to your Bouncify account and navigate to the API page
- Create a new API key, if not created already.
- Open your Web Engage account. Go to your work flow and open your actions block where you have created your email marketing Automation flow.
- Drag and drop the Call API Block onto the Canvas.
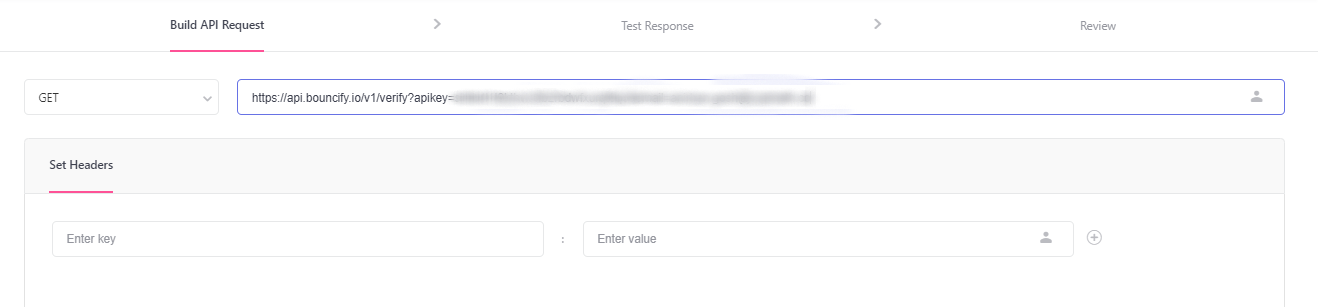
- Click on the Call API block of your Webengage Automation flow chart to integrate it with Bouncify.
- Choose method Get in Your Build API Request and enter the Bouncify single validation API URL
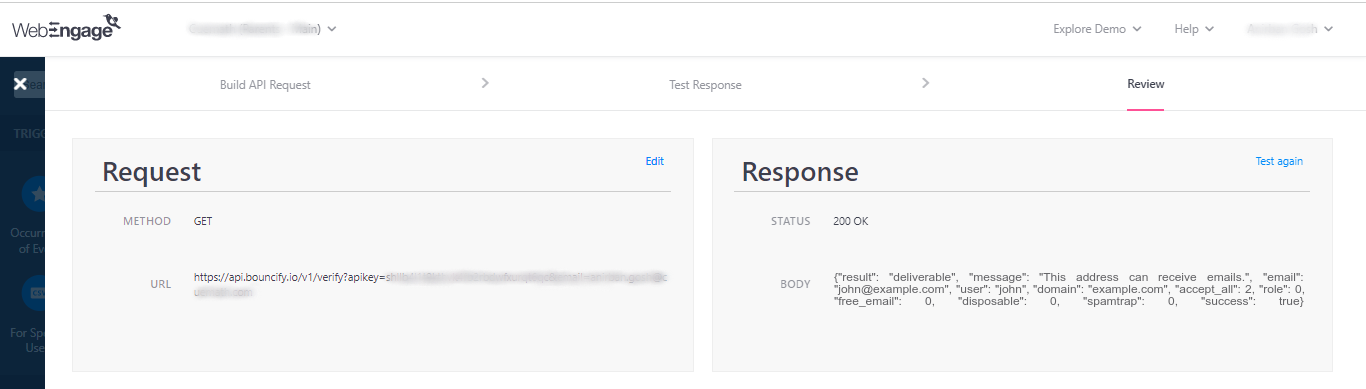
- Now test the response and review it.
- If the review is successful, then click Save to go back to the Canvas.
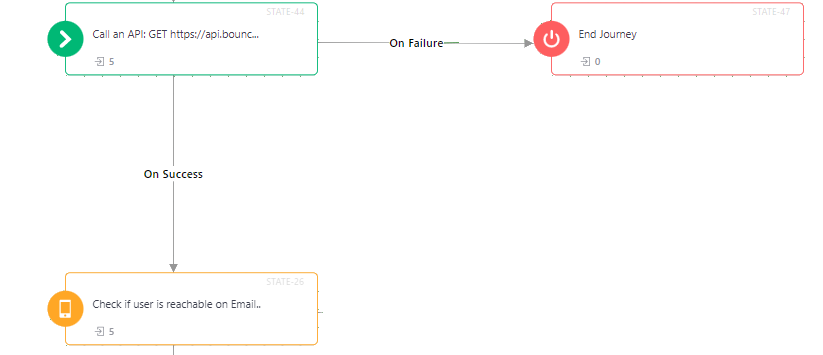
- Branches are logic-based flows that help you determine the subsequent Journey experience for a user, based on the Success or Failure of the API call made for them when they enter the Call API Block.
- Select On Success to continue the Trip for those users for whom the API was successfully called, leading them to experience the next block the branch connects in the Journey.
- Select On Failure to continue the Trip for those users for whom the API call failed, leading them to experience the next block the branch connects in the Journey.
- Depending upon the response, continue or exit the journey.
Key Advantages of Bouncify + WebEngage
- Automated Cloud Sync: No CSV downloads or file formatting issues. Contacts transfer securely via authenticated API or OAuth2.
- 99.4% Verified Accuracy: Comprehensive 9-stage verification eliminates invalid emails, spam traps, disposable addresses, and syntax errors.
- Sender Score Safeguard: Automatically suppress bounces and keep your ESP bounce rate safely below 1%, protecting campaign deliverability.
- Credits Never Expire: Pay-As-You-Go verification credits never expire. Use your credits whenever your campaign schedule demands.
Frequently Asked Questions
In your WebEngage dashboard, navigate to Integration > REST API, obtain your API Key and License Code, and enter them into Bouncify.
Retention workflows (win-back, re-engagement, churn prevention) target older user data that decays rapidly. Verifying prevents sender domain blacklisting.
Yes. You can export results to update user attributes or download a segmented CSV report.
Bouncify processes up to 10,000 emails per minute with high-concurrency infrastructure.